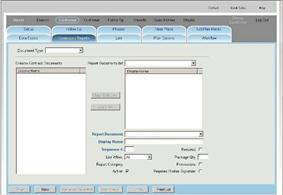
The following section provides a high-level overview of Master Reports in Sales Simplicity. Almost all documents must be registered (entered) in the Builder section and Master Reports tab. These entries defines a type of report, which then creates a pointer to the actual document file, specifies the type of document (Word, Crystal, other), and the source of the data to be merged into the document.
![]()
* All document types are universally called ‘Reports’ in Sales Simplicity.
Overview on Types of Reports and Basic Set Up Steps
There are several types of reports (documents) that can be created for use in Sales Simplicity Software:
Type
of |
Description |
Tools Used to Create/Update |
Contracts |
These Word documents may be based on your builder’s non-option-related Contracts, or other miscellaneous contracts like Addendum or Amendment.
When the contract is printed or previewed, it will change the status of a customer from a Prospect to a Buyer. |
SS Word Macro |
Customer Reports |
These Word documents may be based on your builder’s non-option-related Contracts, or other miscellaneous contracts like Addendum or Amendment.
When the contract is printed or previewed in Customer > Report, it will NOT change the status of a customer from a Prospect to a Buyer. |
SS Word Macro |
Follow-Up |
These Word documents serve as letters that can be sent to customers’ based on planned events, customer ranking, customer status, or other specific events.
Letters can be associated with the Follow-Up > ToDo -or- be printed on an as-needed basis. When letters are processed through the Follow-Up Task Schedule, they can also be sent via email. |
SS Word Macro |
Workflow |
These HTML or text documents serve to notify internal staffs when an assigned workflow process has taken place.
These documents are associated with the Workflow Task Schedule and notification messages are sent via email. |
Creation Utility |
Customer Marketing |
These HTML documents typically serve as marketing letters that’s targeted toward customers with or without filters
These marketing letters can be sent via email to customer with email addresses –or– print for postal mailings |
Creation Utility |
Realtor Marketing |
These HTML documents typically serve as marketing letters that’s targeted toward realtors.
These marketing letters can be sent via email to realtors with email addresses –or– print for postal mailings |
Creation Utility |
eLead Auto-Response |
These Word documents serve as letters that can be sent automatically to customers when the customer makes an on-line inquiry. |
SS Word Macro -or- Creation Utility |
Basic Set Up Steps in Creating/Converting a Document
There are four (4) basic steps to follow in creating documents for use in Sales Simplicity:
1. Create the document using Sales Simplicity Microsoft Word Macro –or– Email Creation Utility program (see above - Type of Documents)
2. Copy the document to the FTP site (or Reports Folder if self-hosting)
3. Create an entry in Builder section > Master Reports tab
4. Assign the document to the appropriate Division and/or Subdivision
Step 1 – Overview to Create the Document and Convert to .DOT file
Ø IF the document is a Contract, Addendum, Amendment, or Follow-Up Letters andin Microsoft Word format, then use the Microsoft Word Macros tool provided by Sales Simplicity
Ø IF the document is a Follow-Up eMail, Customer Marketing, Realtor Marketing, Workflows and intended to be sent by way of eMail, then use the Email Creation Utility tool program provided by Sales Simplicity
Ø IF the document requires conversion to Crystal Report format, use Crystal Reports® version 8.5 ONLY (see notes below)
![]()
* Creating Crystal Reports is technically complicated and should only be attempted by a trained user
* If creating Crystal Report internally, please contact Sales Simplicity Software to have the TTX files created for you. TTX files are necessary to define the Sales Simplicity fields used in a Crystal Report
* If a customized Crystal Report is required, please contact Sales Simplicity Software for a quote
Step 2 – Overview to Place the Document in the Reports Folder
Ø IF the database is hosted by Sales Simplicity, then access to the FTP site will be provided during Admin Training
Ø IF database is self-hosted, then access to the SSNet/Reports folder will be provided to you by your IT staff.
![]()
* The exceptions to this step are Customer Marketing Letters and Realtor Marketing Letters.
Step 3 – Overview to Create an Entry in Builder > Master Reports
Ø Create an entry by filling out all appropriate information in the Builder section > Master Reports tab
![]()
* The exceptions to this step are Customer Marketing Letters and Realtor Marketing Letters
Builder section > Master Reports tab
Field |
Description |
Report Name |
The Report Name will be displayed in the Builder > Master Report list view column |
Report Description |
A description and the purpose of the report |
Display Name |
The Display Name will be used in Division > Contracts, Subdivision > Contracts, Division > Follow-Up, and Subdivision > Follow-Up list views
This is also the name of the report as seen by the Sales Agent in Customer > Contracts list view and in Follow-Up |
File Name |
Click the ‘Select’ button to browse for filename in the FTP site – Reports folder |
Report Type |
Click the drop-down list and select the Report Type. This defines where the document will be available in Sales Simplicity. (Ie Spec Homes Report Type will appear on the Spec Homes section page) (ie: Contract, Follow-Up, Workflow, Spec, etc.) |
Report Category |
Click the drop-down list and select the program used to create the document (ie: Crystal, Word, Other. ‘Other’ refers to the Email Creation Utility) |
Data Source |
Type or select the appropriate data source associated with the Report Type (Data Source is case-sensitive and must be typed exactly as provided) |
Step 4 – Overview to Assign the Document (Report)
Ø IF the document is related to Contract, then assign the document to the appropriate Division section and/or Subdivision section > Contracts tab
Ø IF the document is related to Follow-Up Letter, schedule the follow-up task in the appropriate Division section and/or Subdivision section > Follow-Up tab
Ø IF the document is related to Workflow, identify where to assign the Workflow – Builder, Division, Subdivision, or Builder > Users (or combination of thereof)
![]()
* Workflow does NOT require Step 4 – Assign the Document (Report)
* A contract package is defined as a group of contract documents that are always printed when a customer is initially taken to contract
How to Prepare Prior to Creating/Converting Documents using MS Word
The following section provides procedures for inserting pre-defined Sales Simplicity Merge Fields on a Microsoft Word® based document, for such documents like Contracts, Follow-Up letters, and includes instructions for assigning Contracts to each Subdivision and creating Follow-Up tasks.
There are two (2) types of Word Macro files and two (2) support files provided:
· SalesSimplicity.dot
· Signature.dot
· MacroDataDictionary(revised).xls
· MSWord Formulas - Tips&Tricks.doc
Step 1 – Log-In to the FTP Site
1. Login to the FTP site
2. Enter User Name and Password (assigned)
3. Double-click to open the Support folder
4. Double-click to open the WordMacros subfolder
o SalesSimplicity.dot
The SalesSimplicity.dot macro file allows for inserting of data fields from Sales Simplicity to a Microsoft Word® based document.
o Signature.dot
The Signature.dot macro file allows for Electronic Signature Pad insertion of signature image field location to a Microsoft Word® based contract.
This macro is only used for inserting signature fields when creating/editing Contract documents. Signature fields are only used in conjunction with an Electronic Signature Pad device.
![]()
* Available signature fields includes:
- Main Buyer
- Up to six (6) Co-Buyers
- Authorized Broker (Officer of the Builder who can sign on behalf of Builder)
o MacroDataDictionary(revised).xls
The MacroDataDictionary.xls file provides a list of all merge-able fields from Sales Simplicity software and their associated definitions (description). These are divided into different categories, one for each applicable Report Type
![]()
* There a six (6) different types of categories for merging data fields:
- Contract
- Customer Report
- Customer Letter
- Realtor Letter
- Custom Letter
- Agent Word Report
o MSWord Formulas – Tips&Tricks.doc
The MSWord Formulas – Tips&Tricks.doc file provides customized adjustments on certain merge fields and examples in performing calculations.
How to Install the Sales Simplicity MSWord Macros
Step 2 – MS Word version 2003 (or older version)
1. Login to the FTP site
2. Enter User Name and Password (assigned)
3. Double-click to open the Support folder
4. Double-click to open the WordMacros subfolder
5. Press the Ctrl key on the keyboard and click to highlight both SalesSimplicity.dot and Signature.dot
6. While both files are highlighted, right-click the mouse and select Copy
(hint: for keyboard shortcut, use CTRL-C)
7. On the local computer, open Microsoft Word
8. Click the Tools drop-down list
9. Scroll down and click Options
10. A pop-up Option window will be displayed
11. Click the File Locations tab
12. Click to highlight Startup
13. Click the Modify button
14. A pop-up Modify Location window will be displayed
15. Inside the pop-up window, right-click on the blank white area and select Paste
(hint: for keyboard shortcut, use CTRL-V)
16. A message will appear Copying Files, when complete, the message will disappear.
(this means both files are now copied to the local computer – more specifically in the Word Startup Folder, however it will NOT be displayed in the pop-up window)
17. Click the OKbutton, then OK again
18. Close Microsoft Word, then
19. Open Microsoft Word, again
20. There should be two new sets of icons in the Microsoft Word toolbar (as displayed below) that is now available in Microsoft Word
Step 2 – MS Word version 2007 (or newer version)
1. Login to the FTP site
2. Enter User Name and Password (assigned)
3. Double-click to open the Support folder
4. Double-click to open the WordMacros subfolder
5. Press the Ctrl key on the keyboard and click to highlight both SalesSimplicity.dot and Signature.dot
6. While both files are highlighted, right-click the mouse and select Copy
(hint: for keyboard shortcut, use CTRL-C)
7. On the local computer, open Microsoft Word
8. Both SalesSimplicity.dot and Signature.dot must be placed in a Trusted Folder location. In order to check for a Trusted Folder location, do the following:
- Click the “Office Button” (the circle with the funny logo in the upper left corner)
- Click the “Word Options” button at the bottom of the popup.
- Click the “Trust Center” menu item to the left
- Click the “Trust Center Settings…” button
- In the new “Trust Center” popup window, click the “Trusted Locations” menu item to the left
- This will list the User Locations and should display a “Word 2007 default location for “Startup”, click this entry and details will appear below.
9. Once both SalesSimplicity.dot and Signature.dot is in the Startup folder, make sure that Word is fully restarted (remember that sometimes outlook may need to be closed to fully close all instances of Word if Outlook is using Word as the email editor).
10. Open Word, Create a new document, click the “Add-Ins” menu item at the top (my menu items read “Home, Insert, Page Layout, References, Mailings, Review, View, Add-Ins) , the following icons should appear in the toolbar.
![]()
![]()
![]()
* The Word Macros are typically only to be used by designated Sales Simplicity Administrators –or– Contract / Follow-Up Letter Administrators
Overview of MS Word Macro Icon Definitions for SalesSimplicity.dot
SalesSimplicity.dot
-
![]()
![]() Make SSAgent Report
Make SSAgent Report
§ Creates Agent Reports
§ Used in Reports > Agent or Reports > Subdivision
![]() Make SSCustomer Letter
Make SSCustomer Letter
§ Creates Follow-Up System letters (Customer Letters)
§ Used in Follow-Up > To Do List and Follow-Up > Mail Merge
![]() Make SSRealtor Letter
Make SSRealtor Letter
§ Creates Follow-Up Realtor letters
§ Used in Follow-Up Realtor Merge
![]() Make SSCustom Letter
Make SSCustom Letter
§ Creates Follow-Up Custom Merge letters
§ Used in Follow-Up Custom Merge
![]() Make SSContract
Make SSContract
§ Creates Contract documents
§ Used in Customer > Contracts and Customer > Reports
![]() Add
SSField
Add
SSField
§ When clicked,
displays a pop-up window with a drop-down list containing merge fields
to be inserted into a document
(The selection fields will depend on the
type of document being made)
![]() Clear Fields
Clear Fields
§ Resets the originally selected “Make xxx” and allows for a new selection of “Make xxx”
Overview of MS Word Macro Icon Definitions for Signatures.dot
Signature.dot -
![]()
![]() Design Mode
Design Mode
§ Allows for click-and-drag of any signature field to any location on the contract
![]() Insert Broker Signature
Insert Broker Signature
§ Inserts signature field for the builder’s authorized Broker
![]() Insert Buyer Signature
Insert Buyer Signature
§ Inserts signature field for the Buyer
![]() Insert Co-Buyer 1 Signature
Insert Co-Buyer 1 Signature
§ Inserts signature field for the first (1st) Co-Buyer
![]() Insert Co-Buyer 2 Signature
Insert Co-Buyer 2 Signature
§ Inserts signature field for the second (2nd) Co-Buyer
![]() Insert Co-Buyer 3 Signature
Insert Co-Buyer 3 Signature
§ Inserts signature field for the third (3rd) Co-Buyer
![]() Insert Co-Buyer 4 Signature
Insert Co-Buyer 4 Signature
§ Inserts signature field for the fourth (4th) Co-Buyer
![]() Insert Co-Buyer 5 Signature
Insert Co-Buyer 5 Signature
§ Inserts signature field for the fifth (5th) Co-Buyer
![]() Insert Co-Buyer 6 Signature
Insert Co-Buyer 6 Signature
§ Inserts signature field for the sixth (6th) Co-Buyer
![]() Insert Co-Broker Signature
Insert Co-Broker Signature
§ Inserts signature field for the Co-Broker
![]() Insert Sales Agent Signature
Insert Sales Agent Signature
§ Inserts signature field for the Sales Agent
How to Create/Convert Contracts or Follow-Up Letters
Step 1 – Create New or Convert an Existing MS Word Doc
There are four (4) basic steps to follow in creating documents for use in Sales Simplicity:
1. þCreate the document and Convert to .DOT file
2. ¨ Copy the document to the FTP site (or SSnet/Reports Folder if self-hosting)
3. ¨ Create an entry in Builder section > Master Reports tab
4. ¨ Assign the document to the appropriate Division and/or Subdivision
Ø For creating
a NEW Word document and saving as MS Word template,
go to “How to Merge Data Fields to an MS Word Document (Step-1)”
Ø For converting an EXISTING Word document and saving as MS Word template, go to “How to Merge Data Fields to an MS Word Document (Step-1)”
Ø For EDITING an existing document that has already been converted to an MS Word template, then
1. locate the file on your system
2. with the mouse, right-click the .DOT file
3. select OPEN,
4. then go to “How to Merge Data Fields to an MS Word Document (Step-8)”
How to Merge Data Fields to a MS Word Document
1. Open Microsoft Word
· For creating a new document, MS Word will automatically open with a blank page
· For converting an existing document, click OPEN to search and find the file
2. In the
toolbar ![]() ,
select the Type of Document
to be created or converted, by clicking the appropriate “Make
xxx” button
,
select the Type of Document
to be created or converted, by clicking the appropriate “Make
xxx” button
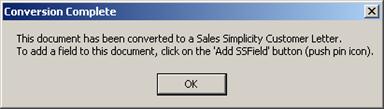
3. A
pop up window with the following message will be displayed
(the message will validate as to the
Type
of Document icon selected)
4. Click the
![]() “Add SSField”
button
“Add SSField”
button
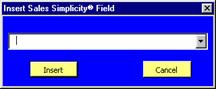
5. A pop up window with a drop-down list will be displayed
6. IF creating a NEW document, type or paste the main text into the document
7. IF converting an EXISTING document, review the main text into the document
8. Search and place the cursor where the merge data field will be inserted
9. From the Insert Sales Simplicity Field pop-up window, find and select the data field
(Refer to the Macro Data Dictionary for detailed description of each field)
10. Click the Insert button
11. The inserted Sales Simplicity data field will be displayed in the document
(ie: <<Buyer’s Name(s)>> )
12. After inserting a Sales Simplicity data field and prior to attempting to type or edit the main text, (ie: adding a space, formatting, or any other action), first make sure the cursor is blinking by clicking anywhere in the main document
(attempting further action in the document without performing this step may cause an error message - Error! No property name supplied.)
13. Repeat the process (step-8 to step-13) throughout the entire document, until all merge fields have been inserted
14. When data
merge field insertion is complete, click the ![]() to
close the Insert Sales Simplicity Field
pop-up window
to
close the Insert Sales Simplicity Field
pop-up window
15. To save the MS Word document, click Fileon the menu bar
16. Click Save As
17. In the Save As pop-up window, click the Save As Type drop-down list and select Word 97-2003 Document Template (*.dot)
18. Click Save In and select the desired drive and folder location to store the file
19. In the File Name field, type the name of the file
(File Name must NOT exceed more than 46 characters, including version numbers, spaces, dashes, underscore, etc. –or– 50 characters including the file extension .DOT)
20. Click the Save button, then
![]()
* Do NOT include a period (.) in the file name, other than the period just before the file extension (ie: *.dot)
* When using a ‘space’ as part of the document template file name, make sure to NOT use two (2) spaces side-by-side (ie: Contract ver-2)
![]()
Step 2 – Place the Document to the FTP Site
There are four (4) basic steps to follow in creating documents for use in Sales Simplicity:
1. þCreate the document and Convert to .DOT file
2. þCopy the document to the FTP site (or SSnet/Reports Folder if self-hosting)
3. ¨ Create an entry in Builder section > Master Reports tab
4. ¨ Assign the document to the appropriate Division and/or Subdivision
How to Place the Document to the FTP Site
Sales Simplicity provides each builder (except for Self-Hosting) with a dedicated server space, which contains misc. documents and reports. These files are accessible by the use of FTP (File Transfer Protocol).
![]()
* To access the FTP Site – use Windows File Explorer
Ø IF builder database is self-hosted, access to the internal web server SSNet/Reports folder will be provided to you by your IT staff
Ø IF builder database is hosted by Sales Simplicity, procedures for accessing the FTP site are provided below:
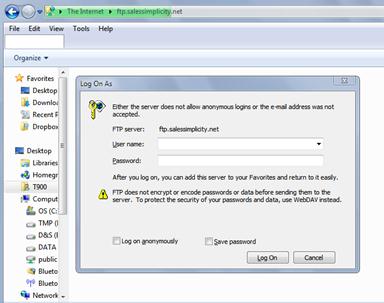
How to Access the FTP Site
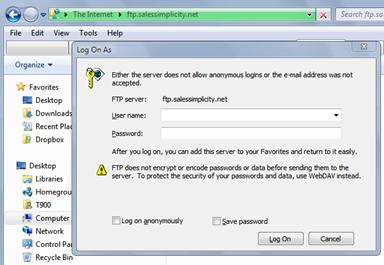
1. Open File Explorer and enter the following in the address line:
- Type ftp.SalesSimplicity.net
![]()
2. Type the login information, provided by Sales Simplicity, in the dialog box. IF self-hosting, access to the internal web server SSNet/Reports folder will be provided to you by your IT staff
User Name: Password:
3. The FTP site, which may contain several folders, will be displayed
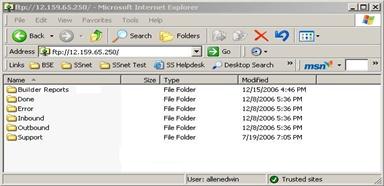
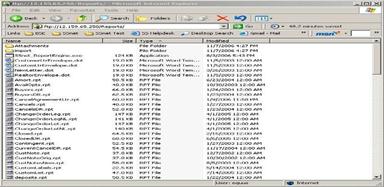
Reports Folder (FTP Site) – Folder Contents
Folders |
Description |
Ø Builder Report |
Contains canned Crystal Reports, Word and Text Templates
Place all builder- specific documents in this folder |
· Attachments |
Place all documents that are to serve as follow-up email attachments in this folder |
· Import |
Place all fully populated Excel templates for data import to Sales Simplicity in this folder |
- Excel Import Templates |
Contains Excel Templates used for importing data to Sales Simplicity |
Ø Support |
Contains assorted Sales Simplicity support files |
· Crystal-Related DLLs |
Windows Crystal Report DLL files used for displaying queried report |
- CrystalExportDLLs |
Windows Crystal Report DLL files used for exporting queried report |
· eLead Configuration Info |
Contains information as to how to set up and configure eLead on builders website |
· EmailCreationUtility |
Sales Simplicity proprietary program used for creating Workflow and Follow-Up emails |
- C-ssNetTemp Files |
Required TXT files used by the ECU program |
· Misc Files |
Contains additional Sales Simplicity support files |
- Mdac&MsXML |
|
- SampleReports |
Contains sample reports typically found in Sales Simplicity |
- SSnet Screenshot |
Contains sample screenshots of Sales Simplicity used for training |
- Training Files |
Contains miscellaneous training-related files used by Sales Simplicity Trainer |
- Training Import Files |
Contains miscellaneous training-related files used by Sales Simplicity Trainer |
· Remote Support |
Contains remote access application for Sales Simplicity Support team to access the User’s desktop for support purposes |
· User Guides |
Contains several types of User Manuals |
· VTicons |
Contains alternative Virtual Topo icons |
· WordMacros |
Contains Word Macro files used for creating Contracts and Follow-Up Letters |
· Workflow Templates |
Contains pre-generated workflow templates |
- ECU Fields |
Contains ECU merge fields for ease of creating HTML files |
4. Place the completed MS Word .DOT file in the (Builder) Reports folder

Step 3 – Create an Entry in Builder > Master Reports
There are four (4) basic steps to follow in creating documents for use in Sales Simplicity:
1. þCreate the document and Convert to .DOT file
2. þCopy the document to the FTP site (or SSnet/Reports Folder if self-hosting)
3. þCreate an entry in Builder section > Master Reports tab
4. ¨ Assign the document to the appropriate Division and/or Subdivision

How to Create an Entry in the Builder Section > Master Reports tab
1. Click the Buildersection > Master Reports tab
2. Click the New button
3. Type the Report Name, Description, and Display Name
4. Click the Select button to locate the file
(All files displayed in the pop-up window are pulled from the Reports folders on the FTP site)
5. Select the appropriate Report Type from the drop-down list
6. Select the appropriate Report Category from the drop-down list
7. The appropriate Data Source will automatically be selected –or– type the provided custom pre-defined Data Source
8. When complete, click the Save button
Step 4 – Assign the Document to the Division and/or Subdivision
There are four (4) basic steps to follow in creating documents for use in Sales Simplicity:
1. þCreate the document and Convert to .DOT file
2. þCopy the document to the FTP site (or SSnet/Reports Folder if self-hosting)
3. þCreate an entry in Builder section > Master Reports tab
4. þAssign the document to the appropriate Division and/or Subdivision
Assign the Document to the Division and/or Subdivision
Ø Division Level – contracts can be setup at the Division section > Contracts/Reports tab for:
- Ease of distribution to the Subdivision level (contracts can be copied from the Division level to the Subdivision section > Contracts/Reports tab)
- Ability to view a list of contract documents for a specific Division
Ø Subdivision Level – contracts can be directly setup at the Subdivision section > Contracts/Reports tab (bypassing the Division level), if the contract is unique to a specific Subdivision(s)
![]()
* A contract ‘Package’ is defined as a group of contractual documents that are always printed when a customer is taken to contract
How to Distribute Contracts to a Subdivision
Ø IF assigning contracts at the Division level, click the Divisionsection > Contracts/Reports tab
1. Click the New button (Sequence # will be automatically assigned), go to Step-4
Ø IF assigning contracts at the Subdivision level (bypassing the Division level), click the Subdivisionsection > Contracts/Reports tab
1. Click the New button (Sequence # will be automatically assigned)
2. In the Report Documents For drop-down list, select the desired Subdivision, go to Step-4
Ø IF all contracts are already set up at the Division level and simply requires assigning of specific contracts at the Subdivision level, then click the Subdivisionsection > Contracts/Reports tab
1. In the Report Documents For drop-down list, select the desired Subdivision
2. Select one or more contracts from the Division Contract Documents list view on the left (Hint: hold the Ctrl button when selecting multiple items)
3. Click the Copy Selected button (this automatically save the selections to the Subdivision displayed) or click Copy All and the Save button
Division section > Contracts/Reports tab |
ð |
Subdivision section > Contracts/Reports tab |
|
|
|
||
4. In the Report Name drop-down list, select the desired contract document
5. The Display Name will auto-fill, based
on the “Display Name” entered in
Builder > Master Reports
6. In the List When Loan Is drop-down list, select a loan type IF the contract is only to be used for a certain type of loan (If loan type doesn’t apply, set the field to ‘All’)
7. Decide if the specific contract is part of the Contract Package
- IF part of the Contract Package, place a check þRequired
- In the Package Qty, type the quantity required for printing (necessary when ‘Required’ is checked)
- In the Previewable, place a check þto allow for preview of contract
- At the Subdivision level only, if using Electronic Signature and if the contract requires the signature of an Authorized Officer of the builder, place þRequires Broker Signature
8. When complete, click the Save button
![]()
* A contract ‘Package’ is defined as a group of contract documents that are always printed when a customer is initially taken to contract
· When printing the contract package in Customer > Contract via the ‘Print Package’ button, none of the contracts in the package will be displayed in a Preview window. Only contracts printed via the ‘Print’ button can be previewed.
How to Include (Merge) Customer Notes in a Follow Up Letter
Customer Notes along with the Note Subject and/or the Note Category can be merged into a regular Follow-Up System Letter or New Letter and this feature is available from the To Do List and Mail Merge.
The fields, which include NoteCategory, Subject, and Note must be inserted into the Word Document Template using the updated Customer Letter Section of the Sales Simplicity Macro (instructions included above and macro related utilities are located in the support folder of your FTP site).
Step 1 – Create a Customer Note
From the Customer Notes tab, you must select the Merge Note In Follow-Up check box for the note you wish to merge. Only one note per customer can to be set to merge into Follow Up.
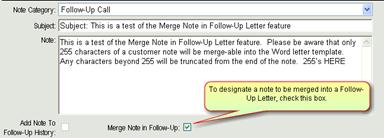
Only the first 255 characters will merge into the letter or email.
Step 2 – Merge Notes In to a Follow-Up Letter
From Follow-Up > To Do List and Follow-Up > Mail Merge, there is a þcalled Include Note. Any customers that have notes set to merge into Follow-Up will be displayed in the List with a different color (the color can be set from the Builder > Field Labels > Common > Colors section).
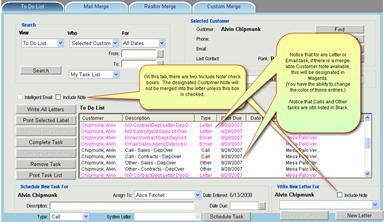
The Include Note feature is available when using the following:
· Administratively scheduled Letter or Email tasks
· Manually scheduled Letter tasks
· Non-scheduled System Letters
· New Letters (Note field only)
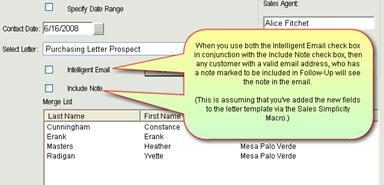
For Letter tasks, the note is also included when Intelligent Email is used, as long as you check both the Intelligent Email and Include Note check boxes.
Notes can also be included in New Letters and System Letters by checking the Include Note in the lower right hand corner prior to clicking New Letter or System Letter.

To include notes from Mail Merge, simply click on the Include Note prior to clicking Merge, and any notes set to merge to Follow-Up will merge into the Letter created with these fields.
Step 3 – Completing Follow-Up Tasks with Notes Included
IMPORTANT: When you mark any letter or email as Complete that contains a merged note, the Include in Follow-Up check box on the Customer > Notes tab will become de-selected. These merge-able notes are only used once, to avoid repetition to the customer.